


There are very few weak points of the LS and LT engines when it comes to an average, or even above-average, performance build. However, when you start pushing boundaries — like making huge turbocharged horsepower for a drag and drive combination — you start finding weak points, like the one Steve Morris points out in one of his latest videos.
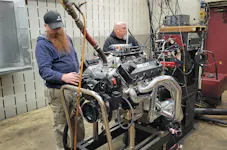
When he recently got Steve Szabolscky’s Ultimate Street engine back in for a freshening up, Morris noticed that the thrust bearing was absolutely shot. Obviously, it held up, because Szabolscky won the Sumerduck Ultimate Street points championship, but it is far from ideal. Since forced-induction cars are notoriously brutal on the thrust bearing, the only way to prevent the combination from tearing it up is to improve the thrust bearing itself.

On Gen III, IV, and V engines, the crankshaft uses a thrust bearing in the number three (center) main journal. However, in order to upgrade to a heavier roller (or Torrington) bearing, it must be relocated to the back side of the first main cap and saddle. This requires some tricky machining, which Morris is more than capable of.
The first step in the process is to machine a face and shoulder on the end of the number one bearing journal on the crankshaft. That allows the first hardened race of the roller bearing to seat flush against the outside of the counterweight. Next, a registration ring is machined to center and support the roller bearing cage. The assembly is followed by a second hardened race to sandwich the roller bearing between the main cap/saddle, and the outside of the counterweight.

Sounds pretty simple at this point, right? Well, the really complicated part is next. In order to fit the new Torrington bearing assembly, room needs to be made between the counterweight and the main. However, reaching the location with a mill isn’t exactly easy. Thankfully, a right-angle boring head for his Rottler F69 machining center allows for a single-point cutter to fit between mains, and cut on the side of the main to create the needed pocket.
Although the CNC machine is capable of incredible precision, the process still requires quite a bit of manual fitting, with checking and rechecking thrust clearance. Once all the machining is complete, with adequate room for the new roller thrust bearing, it’s almost complete. See, the new roller bearing only limits the crankshaft’s forward travel. While that is the offending motion that causes the damage to the OEM thrust bearing, you still need to be able to control the crankshaft’s rearward motion.

That is achieved by… the OEM thrust bearing. See, the rearward motion of the crankshaft is nowhere near as violent as the forward motion, so the OEM bearing is more than capable of accomplishing that job. However, the forward face of the OEM bearing needs to be sanded down, so that it doesn’t make contact with the crankshaft before the new roller bearing does. Thankfully, that’s an easy clearancing task. And, it doesn’t require a special thrust bearing when ordering bearings for the engine.
While Steve Morris makes it look incredibly simple, there is a lot of experience and knowledge behind the modification. It’s not needed for your everyday 1,000-horsepower turbo LS, but when you are regularly beating the snot out of it on the street and dragstrip, and don’t want to risk a mid-season bearing failure, this is a worthwhile upgrade.

You might also like
LS5.0 Gets A 3D-Printed Rotating Assembly
3D printed rods and pistons are incredibly inexpensive and lightweight and help project LS5.0 rev to the moon.

