 [1]
[1]
In case you hadn’t heard, the LS movement is in full swing. Let us be the first to tell you, it’s real and it’s here to stay. That doesn’t mean the traditional, iron small- or big-block is going by the wayside, however, it’s slowly being overwhelmed by a breed of new-age, horsepower-hungry fellows.
 [2]
[2]The LME facility remains complelty in-house. From basic machining to full dyno tuning, LME can handle any LS build.
With the seemingly painless ability to make gobs of power with little effort, backed by reliability that would make any daily-driver jealous, making the choice to go LS is guilt-free and effortless. Of course, there’s one drawback: Cost.
Nowadays, a 500 horsepower daily-driven street mill doesn’t garner up the kind of attention at local meets or gas station pumps like they used to. To be honest, it’s almost too easy to make power these days with late-model mills, and cost permitting – anything is possible.
After all, money can’t buy you happiness but it can buy you a lot of horsepower.
 [3]
[3] [4]
[4]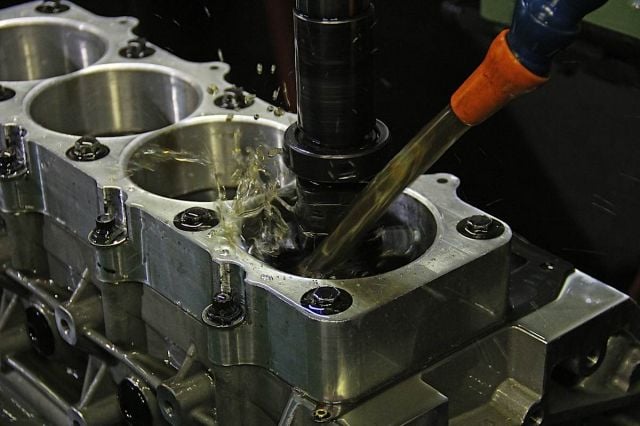 [5]
[5]
Sure, piecing together a tried and true combination utilizing an iron block would make plenty of punch, especially considering we could do it for pennies on the dollar. Could a budget-friendly iron small- or big-block make lots of power on the cheap? Yes. Could you daily-drive the mill to and from work? Yes. Could you drive to your local autocross and compete? Probably.
 [6]
[6]LME performed all of the necessary machine work, which included cutting 0.010 inches off the deck.
However, you’d be hard-pressed to take the same mill, wring it out for all its got during an open-track event or test and tune night at the local dragstrip and then rely on the same engine to get you home time after time. Our requirements weren’t what the normal crowd was after. We were essentially in search of a street-clothed Powerlifter with the stamina and endurance of an MMA fighter. That’s asking a lot out of any engine, however, considering the aftermarket’s ability to churn out race-style components with off-the-shelf availability, we knew it was possible.
While we’d like to all think just because you spent a day on the dyno here and there, watched your buddy torque down the main caps or adjust timing, that you’re part of the dyno-tuning and engine-building Guru squad. We’re happy to tell you, chances are that’s probably not true at all. Let’s be honest here, folks – would you tell a Doctor to revise his decision on where he makes an incision?
While the block comes from RHS ready to assemble, some preliminary machining was required since a majority of the components were custom-built for this project. [7]
[7] [8]
[8]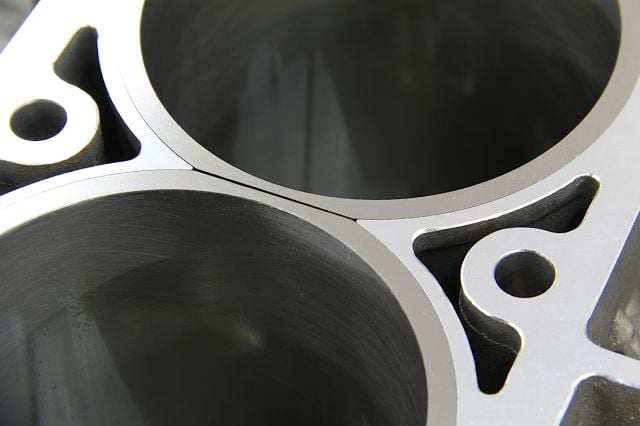 [9]
[9]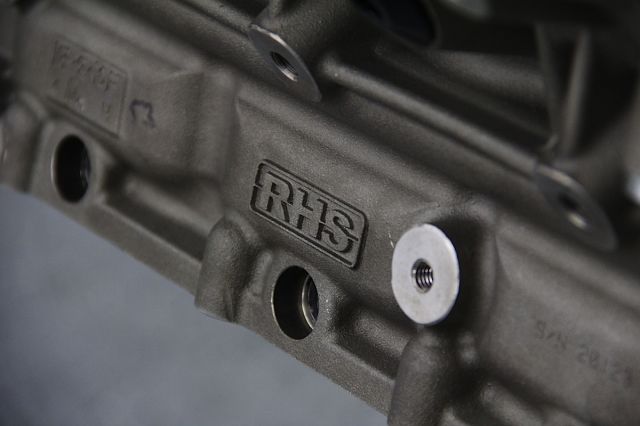 [10]
[10]
Considering our engine building experience history is limited to say the least; usually relying on complete crate engines for project builds, we were after something a bit different this time around. While our crate engine experience has been nothing short of successful, ground up builds seem to reap the most attention. With that in mind, we set out to put together a potent LS build beginning from ground zero.
 [11]
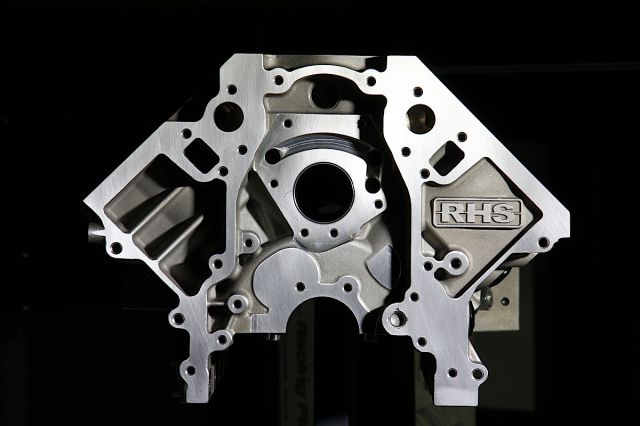
[11]The RHS aluminum race block provides all of the necessary, factory-style design; allowing even the heartiest of race engines to install directly into a late-model Camaro, Corvette or GM truck.
The Block // RHS Aluminum Tall-Deck
It all began with with a bare RHS LS block, and to handle our hands-on approach, for this particular build, we set up with Late Model Engines [12] (LME) out of Houston, Texas for all of our machining, assembly, dyno and tuning needs. There, LME and front man Bryan Neelan, completely prepped our bare, tall-deck (9.760-inch) RHS block [13]; filling it with components from ARP Fasteners [14], COMP Cams [15], Clevite [16], Lunati [17], Total Seal [18] and Wiseco [19] to end up as a big-swinging, big-inch 502.
 [20]
[20]
RHS LS Tall-Deck Block Specs
- Designed from heavy-duty A357-T6 aluminum material
- 4.125-4.165-inch Siamese cast bore walls with press-in spun cast iron liner
- Available in standard (9.240-inch) & tall (9.750-inch) deck heights with beefy 0.750-inch deck thickness
- Both standard deck (5.67-/5.87-inch- same as LS7) & tall deck (5.94-/6.38-inch) cylinder liner lengths available
- Extra long liners for standard (5.87-inch) & tall (6.38-inch) decks
- “Long arm friendly” design – Accommodations for up to 4.6-inch stroke with standard rod pin diameters (2.100-inch) & oversized 60 mm camshaft
- Raised cam centerline (0.388-inch/9.86mm) to allow larger stroke; 2 extra links in the timing chain
- 6 head-bolt design with full water jacket around the cylinders (based on LS7 design)
- Main Cap surface area maximized at mating surface and large fillets from cap to cross bolts for added strength
The potential for making a ton of twist is merely a game of cubic inches and compression. In other words, the more cubic inches you’ve got to pack air and fuel into, the more power you’re going to make. To get things off on the right foot, we were more than eager to try out RHS’s new, ready-to-hone, LS aluminum Race Block. We’ve mentioned this industry-leading block before. Catch up on the RHS Aluminum block, here. [21]
The block featured Wiesco piston-swallowing, 4.120-inch bores with a total, 6.380-inch cylinder sleeve length. From its crate, LME took the reigns and performed all of the necessary in-house machine work for good measure including, an align-hone, deck and finish hone before we could begin assembly. For good measure, the LME team bumped the align-hone from 2.7512 inches through the mains to fine tune the housing bores, which ended at 2.7509 inches.
Since the blocks come from RHS bored to size at 4.160-inch, LME merely needed to touch each cylinders block with the hone. For proper piston and ring fit, LME was able to hog out enough material; allowing 0.0037 inches of clearance from each bore. Without punch from each combustion chamber and to raise compression, the deck was cut 0.010-inch, with a final deck height of 9.740-inch.
From there, the block was washed including removing any material from the oil galley’s. RHS already installs the cam bearings prior to delivery. It’s important to keep in mind that each oil galley is thoroughly cleaned since some material can hide in and around the bearings.
We’ve detailed all of the specifics on the RHS block below in the video. Make sure to take a look at the clip. Our next step was installing the custom grind, COMP Cam.
COMP Camshaft // ‘Stick It In The Middle
Of course, at the heart of any high-revving engine, it’s only as happy as the camshaft allows it to breath. In our case, we went right to the professionals at COMP Cams [15]. Honestly, where else would we go? To gain an upper hand in the rev department, we went with a custom grind, hydraulic roller ‘stick with 254/266 degrees duration and 0.660/0.660-inch lift at 0.050 on a 114 LSA.
Could this cam live on the street? To find out, we asked Bryan Neelen, owner of LME. According to Neelan, the camshaft couldn’t be a better choice. “Based on the projected power and application, and our past experience in building big-block RHS engines, we had a good starting point of where to begin at 0.050-inch of duration, as well as the lope separation. We had to keep in mind that this is still a street car with road race capabilities. It needed a broad power curve as well as the ability to spin 6,500 rpm. It’s a fine line.” Neelan continued, “If we went much bigger on the camshaft, we would have lost power in the low to mid-rainge and would not have seen a worthwhile gain up top. This is due in part to the limitations on the intake manifold with lots of cubic inches.”
 [22]
[22]The custom-grind COMP camshaft choice we made is no slouch. It will allow our big-inch LS engine to breath in all areas of the rpm. This means lots of low-end grunt to pull the vehicle out of corners and plenty of high-horsepower up top in the rpm to keep us pulling on the straightaways.
To compliment our healthy camshaft choice, we’ve also paid special attention to the remainder of the valvetrain. While we’ll be showcasing the top end of the build in a later story, it is important to note we’ll be relying on additional components from Chevrolet Performance [23] like our set of LS7 style intake and exhuast rocker arms, both in the 1.8:1 ratio backed by an RHS rocker stand.
 [24]
[24]We took our time and gently fed the camshaft into the block.
We’ve also gone with a set of COMP, short travel hydraulic race lifters (Ti-bar required for LS blocks). What’s so special about these lifters? Well, they have been engineered from a patent-pending design that specifically performs at higher engine speeds. They are designed to limit the lifter’s internal piston as it is pumped up. By limiting that movement, the COMP Cams short travel race hydraulic roller lifters cut down on the loss of power and limit valvetrain failure at higher rpm. The lifters are REM-finished and then black oxide coated for extreme durability, even for those high-revving engines.
With the help of the LME staff, we applied some camshaft lube liberally and carefully installed the ‘stick. We were careful not to gall the camshaft bearings. Once in, we were ready for the remainder of the rotating assembly.
 [25]
[25]With the high-lift COMP camshaft installed, we could move on to installing the remainder of the short-block. This included the Lunati stroker crank, rods and large-bore Wiseco pistons providing 11.5:1 points of squeeze.
Rotating Assembly // Swing Big, Punch Hard
If you’ve ever watched a boxing match, each swing is a calculated move. Each jab is carefully premeditated to assure that it brings a world of hurt to the opposing contender. With the same thought process, we knew the only way to get the kind of punch we were looking for, was to look for the right crank and rod combination. In our case, we went after Lunati and their Pro Series [17] line of crankshafts with a 4.600-inch throw.
 [26]
[26]Our Clevite H-Series bearing set came complete with main and rod bearings.
Rod journals are large, too, with 2.100 inches of diameter, able to support a minimum rod length of 6.125 inches. Before we planted the crank for final, we first installed our standard, H-Series Clevite [27] main bearings. H-Series bearings for our applicaiton are important considering the potentially mid- to high-rpm this engine will live at.
Each bearing contains a steel backing with carefully selected overlays and high crust factor. Our H-Series bearings also come with enlarged chamfers at the sides for greater crank-fillet clearance.
For our application, we simply unpackaged the set and rinsed them with solvent to remove manufacturing residue or debris.
 [28]
[28]Providing swing, our 502-inch LS motor relied on a super-fortified forged crankshaft from Lunati. The Pro Series cranks feature aircraft-quality standards and drilled rod journals with lightening holes to reduce the inertia weight of the crankshaft.
From there, we laid the crank in and fortified its final resting place with a complete set of RHS main studs, which were clamped down with the RHS main caps. We torqed the main caps down to 95 ft-lb while the side bolts were fastened down at 35 ft-lb. With the crank set and thrust checked, we could begin the tedious process of filling each bore with a connecting rod set and Wiseco slug. The connecting rods we went after were also from the Pro Series line from Lunati. These rods are designed for higher horsepower and rpm applications; derived from aerospace 4340 alloy steel. Each complete set comes with ARP 2000 rods bolts as well to keep things together.
 [29]
[29]The choice to continue the Lunati theme was simple. In our case, we needed a connecting rod that could live at high rpm. For this, we went with the Pro Series line of rods from Lunati. These rods feature Aerospace 4340 alloy steel and come complete with ARP 2000 rod bolts. LME fitted the big end of each rod with a narrowed, Clevite (PN CB66HN) rod bearing.
 [30]
[30]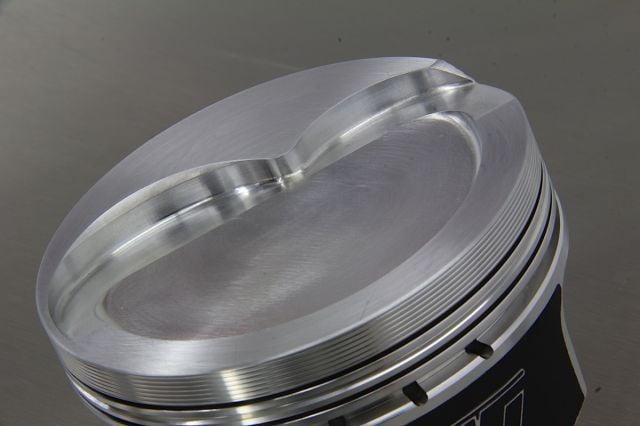 [31]
[31]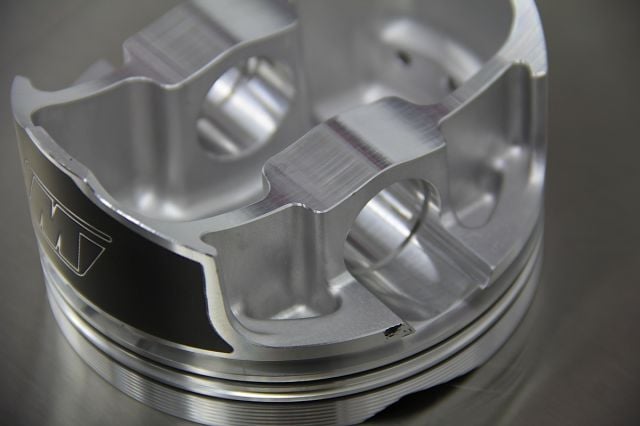 [32]
[32]
Wiseco Forged Pistons // A Complete Slug Fest
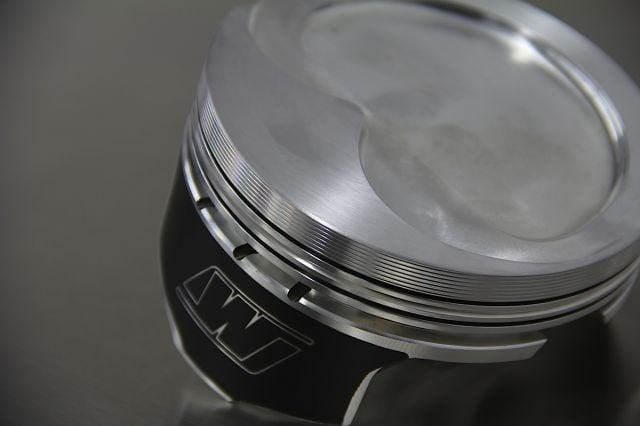
Our custom-built, 4.165-inch bore Wiseco pistons looked more like coffee table art displays rather than actual engine components. These high-compression slugs with -19cc, reverse dome LS7 pockets and lateral gas ports were custom cut by Wiseco to handle the 11.5:1 squeeze in the bores. Each slug was also treated to an anti-friction coating on the skirts for extra strength and to wick away power-sapping heat. Of course, Bryan Neelen shared with us the method behind the madness. “As cubic inches increase, the total volume of the piston and combustion changer increases to maintain a certain cubic inch. For example, a 427ci engine with 68cc chambers will need a -6cc piston to make 11.5:1. For this 502 inches, we’d need a -19cc dished piston to maintain the same, 11.5:1 compression with 68cc chambers.” With plans to hit this engine hard with high-rpm blasts, our ring package was just as important to the remainder of the build.
 [33]
[33]Each forged piston were outfitted with Wiseco’s ArmorGlide skirt coating. The result allows for the ultimate in skirt coating toughness; allowing for superior lubrication to minimize friction, maximize horsepower, and provide improved wear resistance. It also allows for a better ring seal and reduced noise from piston knock in tighter clearance bores.
For our pistons, we went with a Total Seal [18] ring package, which consisted of a Top AP Stainless Chrome (PN 100554), second cast Napier (PN 207946) and standard tension 3 mm oil rings (PN 001874).
Why is the ring package selection so important? In a nut-shell, rings provide the vital seal between the combustion cycles and the oil. Rings also prevent blow-by and, more importantly, prevent the rings from butting up against one another and scoring the cylinder walls. A healthy set of rings is essential to generating and maintaining power. After we cleaned each of the rings with solvent to avoid contamination, we were able to install the oil support rail first with the “dimple” on the side of the ring facing down. This prevents the ring from rotating in the piston groove.
Our next ring was the expander or first oil ring. This ring provides outward tension on the oil rails against the cylinder walls. From there, we set the two thinner rings in place, on the bottom and the other on top. It’s important to never face the two ring gaps on top or in line with one another. This could potentially allow excessive amounts of oil to get past or leak by the oil ring.
 [34]
[34]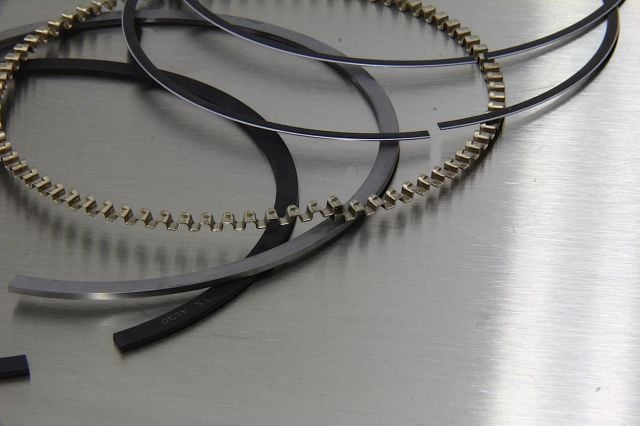 [35]
[35]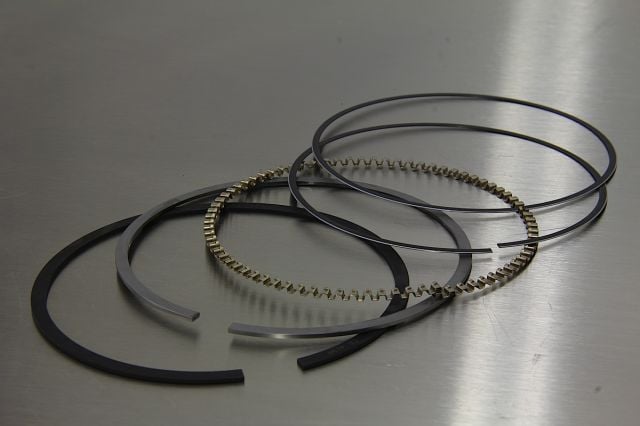 [36]
[36]
The second ring has a “step” (chamfer) built into its design. This specific ring’s chamfer, depending on your application, should always face down. In some cases the “raised” dimple will face up to indicate which way the ring needs to be placed. Finally, our top or main compression ring was set into place. It’s the first line of defense in the cylinder against the intake charge, along with brutal heat and punishment from exhaust gases. The top rings bevel goes up along with the dimple. After all eight of our pistons were hung on the rods and ringed, we were ready to begin filling each bore.
Once the rod and piston combination was set into place, we locked each rod cap down. In the meantime, we had finished a majority of the short-block. We already have plans for our next round of build by prepping the rest of our components.
What’s Next? // Topping Off The 502 Build
You’ll have to keep reading for our second portion of this story. There, we’ll conclude our big-inch RHS build by installing the remainder of the valvetrain including; the COMP roller lifters, heavy-breathing RHS cylinder heads, COMP roller-rocker set, and FAST intake manifold and throttle body. To finish it off, we’ll contain the bottom-end with a dry-sump system from Aviaid [37] oiling system and get the engine on the LME dyno for a complete round of testing. We’re sure you’ll like what we have coming up in part duex of our LS build. Of course, we’ll show you what’s involved and any tips and tricks we find along the way. Stay tuned!
This engine is destined for our ’69 Camaro project car, a soon-to-be Pro-Touring machine. Follow along with our “Blank Slate” project car build by clicking here [38].
Parts List // LME 502 Build Sheet
| MFG | DESCRIPTION | PN | COST (Approx.) |
| ARP | LSX 12 pt. Engine Bolt Kit | N/A | N/A |
| Clevite | H-Series rod bearings (high-performance narrowed, set) | CB66HN | N/A |
| Clevite | H-Series main bearings (standard, set) | MS-2199H | $150 |
| COMP Cams | Custom-grind, 254/266 duration, 0.660/0.660-inch lift at 0.050 on 114 LSA | 54-000-11 | $400 |
| Lunati | Pro Series 4.600-inch 4340 forged crankshaft | JC711ER | $2,000 |
| Lunati | Pro Series 4.600-inch 4340 forged connecting rods (set) | 60363001-8 | $1,340 |
| RHS | 9.760-inch LSX aluminum block | 54901U | $4,700 |
| Total Seal Rings | Ring Package, Top AP Stainless Chrome, standard tension 3 mm oil rings | 100554, 207946, 001874 | N/A |
| Wiseco | Custom-order set, 4.165-inch bore, -19cc reverse dome, 11.5:1 compression, ArmorGlide coated | N/A | N/A |
 [39]
[39]